
Into the Unknown, of being 5…
Every year, I have put my creative abilities to the test for my daughter’s birthday. She turned five at the beginning of July, but we had started the planning back in February. We decided on a Frozen 2 theme because…well, Frozen 2 is basically “life”for a 5 year old right now. I was really excited to put my imagination to work and my wheels started spinning.

Come March, I realized the severity of Covid-19 and knew it would most likely effect her party. I gave my daughter the heads up to prepare her so she wouldn’t get disappointed. I then made the promise that I would still try to give her the birthday she wanted, minus all of the guests. We’ve been staying with my parents and I had to make our decorations somehow work with their home set up instead of the Lodge we would normally use. It would be a challenge, but I was up for it.
I’m not a huge fan of licensed trademark decorations. I prefer to just buy the color scheme for table cloths, balloons, streamers, utensils, and plates at places like Dollar Tree or Walmart (which are often a few cents cheaper). Then I add flare to the decorations by adding our own handmade personal touches. I also save a lot of our party supplies from each past birthday to try and reuse at another time. For this party, I already had some balloons in the colors, as well as the streamers and a “Happy Birthday” balloon display that we found in the dollar spot of Target for my son’s birthday, last year. Aside from that, I purchased a Frozen theme Mylar balloon set with a large number 5 balloon, as well as a balloon arch set that came with snowflakes balloons and latex balloons. I ended up not even using the Frozen 2 Mylar balloons and only used half of the other kit. Using a balloon blower really helps make the process easier and we didn’t need helium.


Second hand decor
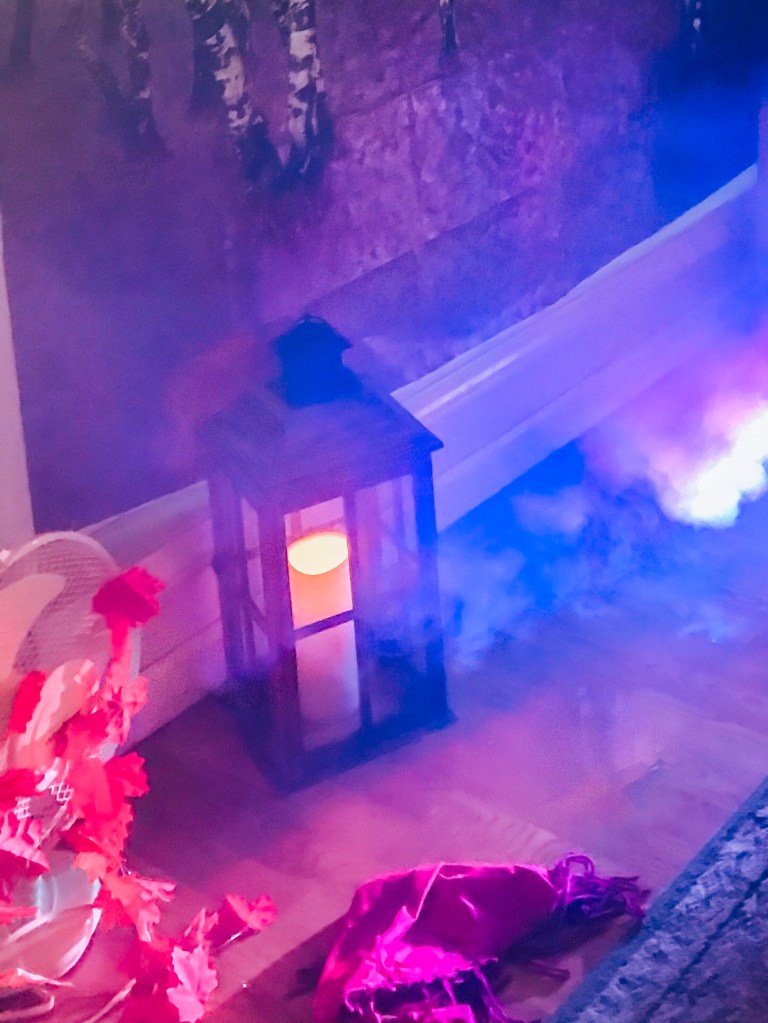
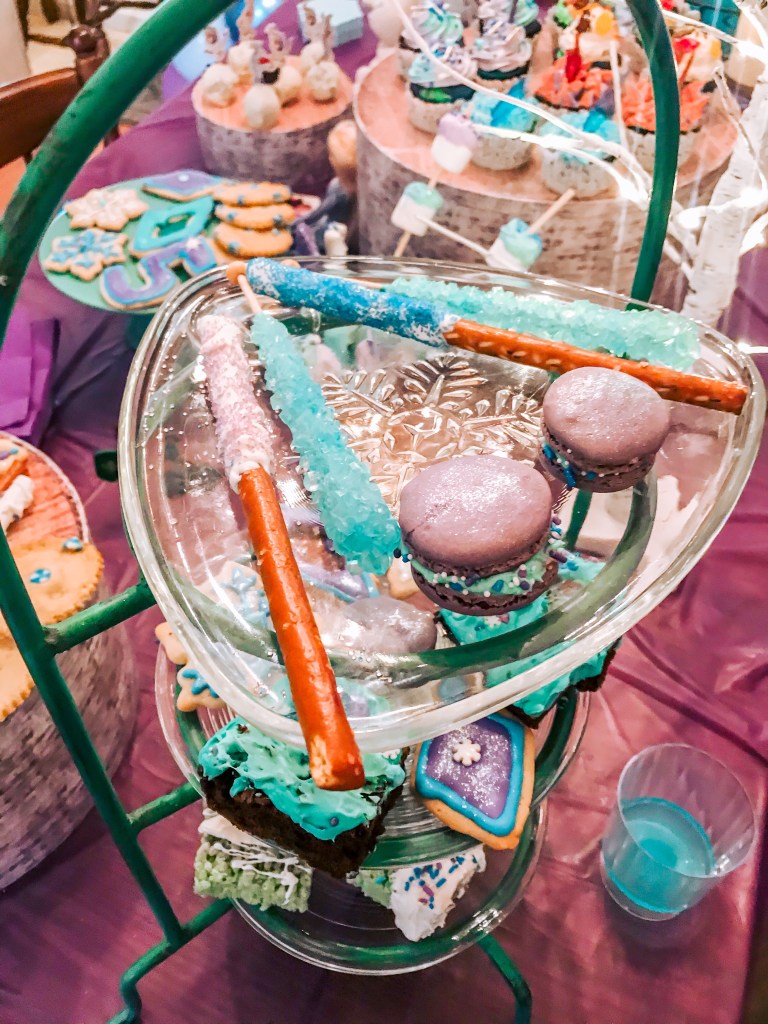
I prefer to buy things slowly (if I have to purchase them) because I’m on a limited income. I also give myself plenty of time so I can search for things at thrift stores, free giveaway groups, sales, FB marketplace and clearance items. I happened to find a woman getting rid of a beautiful and huge wooden lantern. I knew it would be a perfect accessory for Arendelle. It just was missing some glass and needed some wood glue and a cleaning. I also got lucky finding a lovely three tier stand that was teal in color. The woman wanted $5. I immediately imagined it on our dessert table. I also managed to find some snowflake plates and battery operated candles at Goodwill and Value Village. I love Value Village because their stuff is half off on the last Wednesday of every month. This past Spring, Target’s dollar spot had lots of different cake stands and I managed to grab a two tiered white one and a teal cake stand. All of these things will be able to get use again at my son’s “party” or any other party.
Homemade Decor
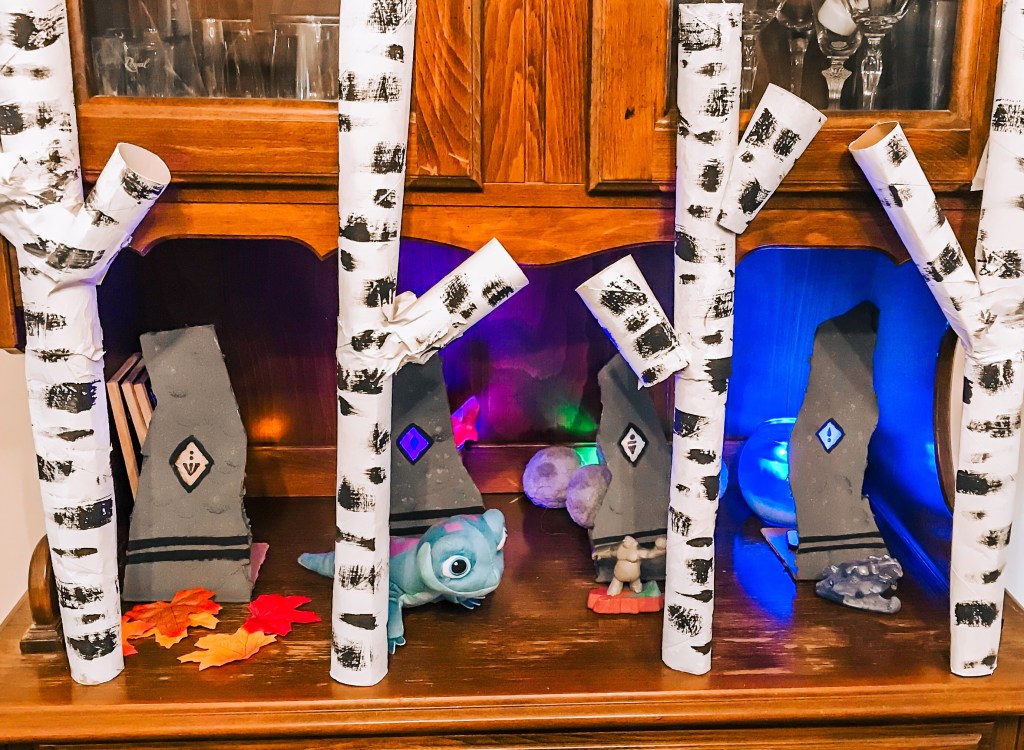
Other ways that I like to save money and get creative, is to make as much of the decor as I can. I like to try and use things from around the house or create from supplies we have. For this party, I chose to collect toilet paper rolls and paper towel rolls to recreate the birch trees from the enchanted woods. I used tape and sometimes hot glue to keep them together and painted over them. I used a flat dry brush with little paint on it to create the black lines. I also mixed a little black and white to get that off white look.
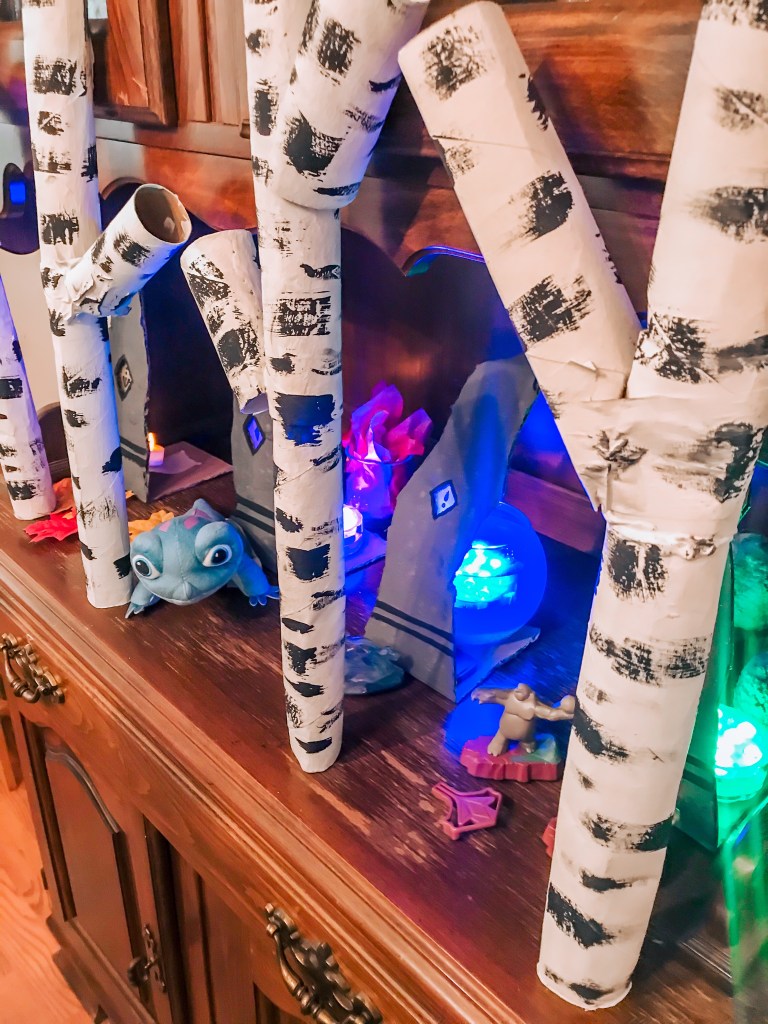
For the infamous ice diamonds that appear at the end of “Into The Unknown”, I had to get creative. At first I was trying to come up with the perfect materials to make them. I tried wax paper and parchment paper. Both with crayons, paint, markers and colored pencils, all with no luck. I wanted something opaque but can also make the designs on them. I finally came up with the idea to use good ole 80’s and 90’s favorite, Shrinky Dink paper! While this worked really well and gave me exactly what I wanted, it took way more paper than I’d like. Each diamond took a full sheet of plain shrinky dink paper. I didn’t want to spend more money than I needed to, so I limited my diamonds to just three strands.
